Ascending Saint Helens, Part 4 of 4: The gear that got me there
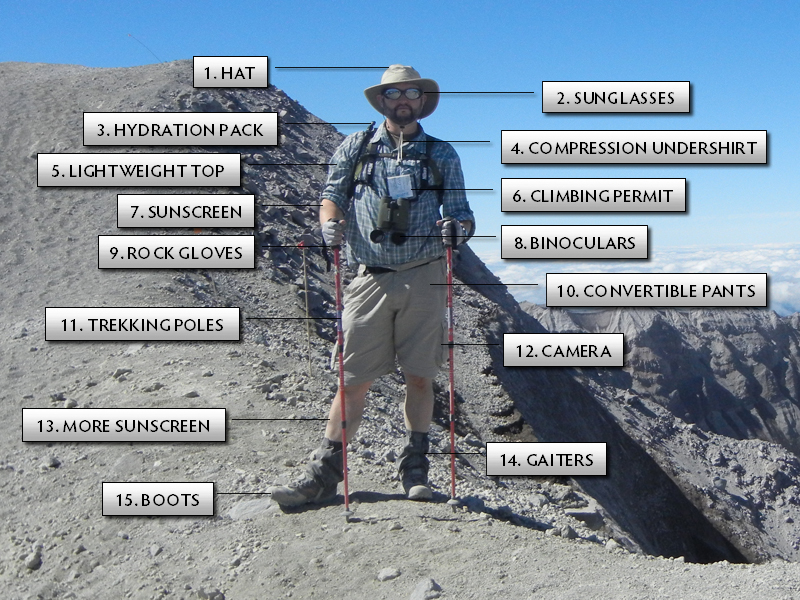
1. HAT. An absolute must if you want to keep the sun off your head, neck and ears. There are a number of options for headgear, from baseball-style caps with cloth extending over the neck to the Indiana Jones-style wide-brimmed hat I prefer. I was torn between an Outdoor Research hat with a polyester band and the nylon Sunday Afternoons hat that I ended up with. Either way, go for one with a moisture-wicking headband and lightweight fabric, and it helps to have an elastic adjuster in the back to secure it to your head. SPF protection is also a plus, as is a chinstrap.
2. SUNGLASSES. The key here is keeping wind, dust and sweat out of your eyes. While Dad went with a thick-framed wraparound (available at any Walgreens, Rite-Aid or CVS store) he could wear over his prescription glasses, my wonderful wife got me the pair of Julbo Colorado Mountain Sunglasses (in black metal) for my birthday that I had on my Amazon wish list. Without hesitation, I would recommend this type of eye protection as I had exactly zero problems with sweat, dust, wind, or any other potential eye hazard including UV rays (not to mention they look pretty good too).
3. HYDRATION PACK. I never go hiking without my 2-liter, olive drab Camelbak I purchased in the Army 10 years ago. Most of the time I don’t need that much water on a hike, but in any emergency situation I’d rather have it and not need it, than need it and not have it. But for St. Helens, a minimum of 3 liters are recommended so I had to carry a couple 22-ounce water bottles clipped on to the hydration pack with carabineers (there’s about 34 ounces in 1 liter), and I had finished all three before the day was out. The general rule is to start hydrating several days before your climb, and watch for signs of dehydration while on the climb. If you’re not sweating and you don’t have to urinate, you’re probably already dehydrated. Dad bought a hydration pack with extra zippered pockets and found it much more helpful for carrying gear. If I did it over again, that’d be the way to go.
4. COMPRESSION UNDERSHIRT. Not a necessity but certainly helpful, compression shirts help to reduce muscle fatigue over the 8-12 hour exertion that you’ll be undertaking. They’re also moisture-wicking, so you’ll stay cooler during the 6-10 hours you’ll be mountain climbing in direct sunlight. You can spend big bucks on these at high-end sports stores or you can pick them up cheaper at the big retail stores. Personally, I’ve found all of mine in great condition at Goodwill.
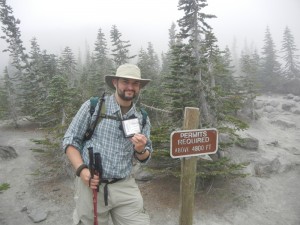
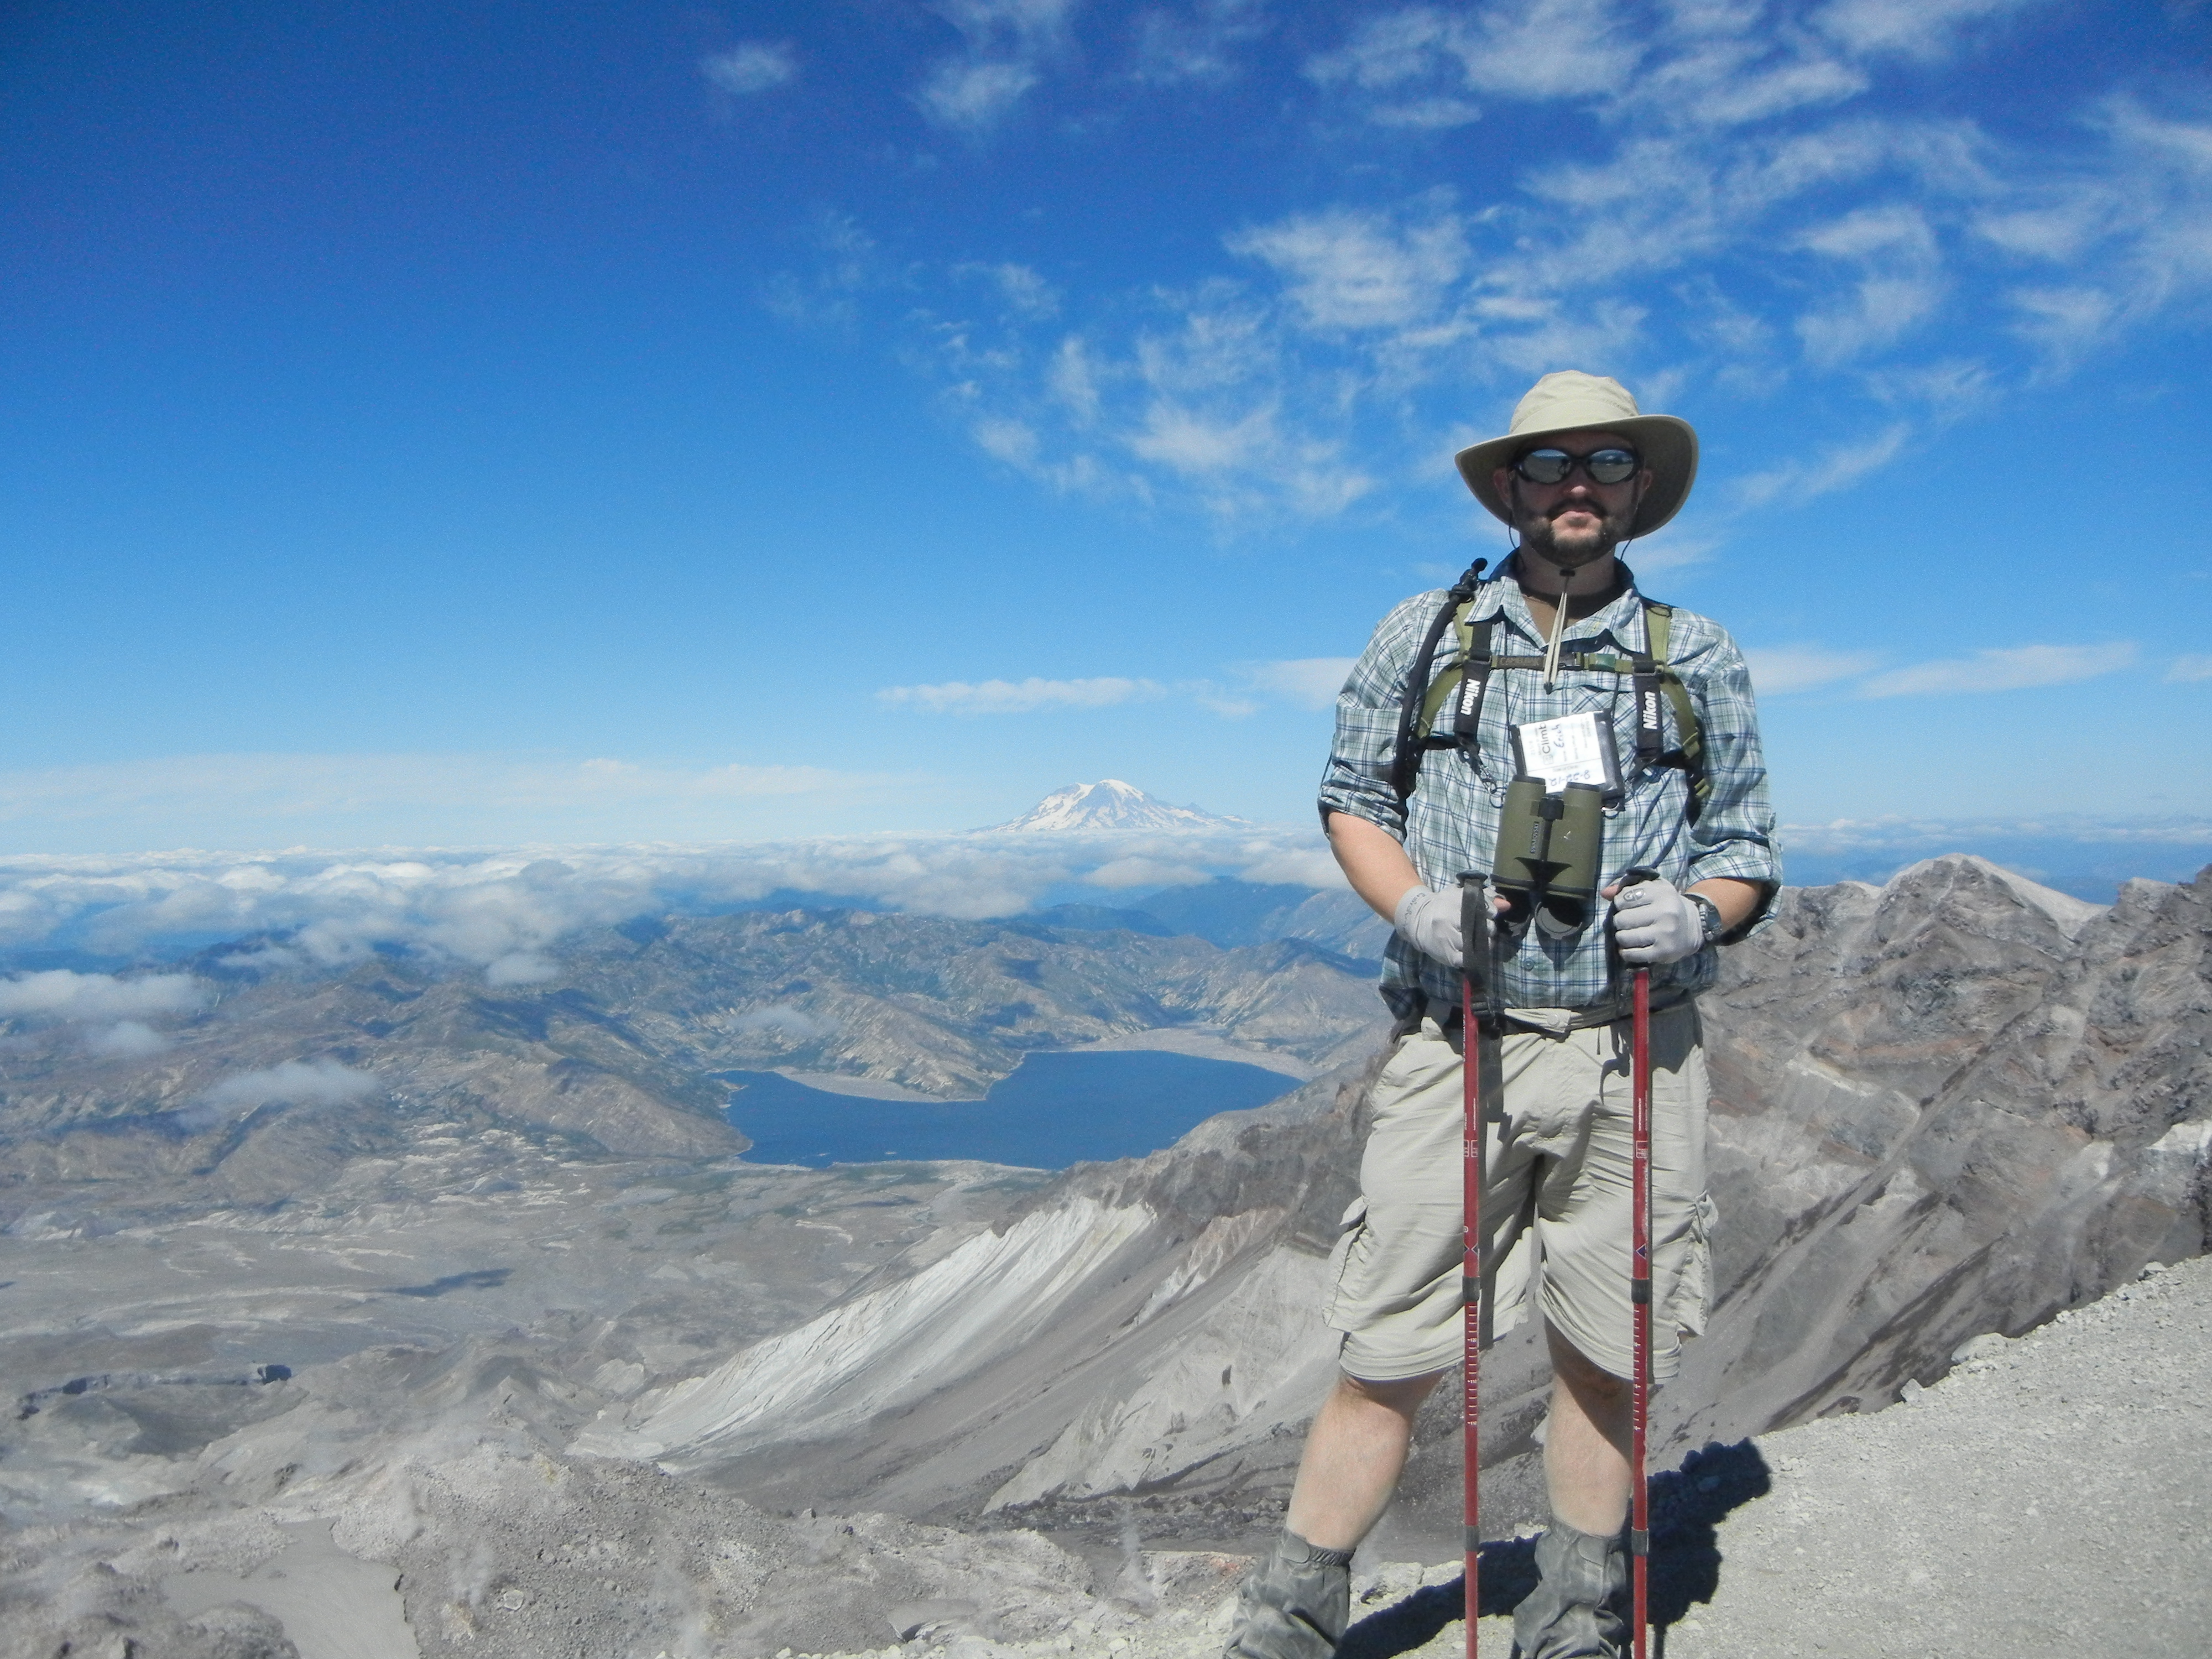
5. LIGHTWEIGHT TOP. Again, not a necessity but it could come in handy. For example, mine was an insect-proof, 50+ SPF long-sleeved button-up that had straps to hold the cuffs if you wanted to roll them up (like in my picture above). The insect repellant feature wasn’t necessary as the only bugs we came into contact with were bees and horseflies. The SPF feature was nice and I kept the sleeves rolled down as long as I could, but eventually the sleeves came up to help me cool off. Truth be told, any lightweight fishing-type shirt will suffice.
 6. CLIMBING PERMIT. Required to be displayed at all times while climbing Mt. Saint Helens. While you won’t need one if you’re just hiking up to the 4,800-foot marker, very few people go that far and then just turn around. You have to purchase them early in the season to reserve a spot (I got ours in February), as only 100 climbers per day are allowed up the mountain. Once purchased, they can be retrieved from the Lone Fir Resort in Cougar, WA, on the way to Climber’s Bivouac where the Monitor Ridge trail begins. You can also pick them up a day in advance, and don’t forget to sign the climbing register at the resort as well. You’ll have to sign back in when you return at the end of the day.
7. SUNSCREEN. Don’t leave home without it, and don’t think that just because it’s cloudy you can’t get burned. Make sure to bring at least two average-sized bottles of sunscreen and reapply it to exposed skin frequently. At higher altitudes, the sun’s rays are not filtered as well by the atmosphere and because the temperature is cooler, it’s easy to be fooled into thinking you’re safe. You’re not. I prefer the lotion kind, but the spray kind would work too.
8. BINOCULARS. You’re going to hate climbing for an entire day with a bulky pair of binoculars either strapped to your chest or in your pack, but you’ll be kicking yourself if you get to the summit on a clear day and don’t have them. One of Dad’s retirement gifts several years ago was a pair of Swarovski crystal binoculars and I was sure glad I had them at the top. Literal crystal-clear views of the crater, Spirit Lake, and Mounts Rainier, Adams, Hood, and Jefferson, not to mention the entire Gifford Pinchot National Forest.
9. ROCK GLOVES. I bought a pair of these fingerless Glacier Gloves on a whim while I was buying my hat. My wife kidded me about being a sucker for an impulse buy, but by God did I end up glad I had them. They’re not that expensive and will really help when you’re scrambling from car-sized basalt boulder to razor-sharp pumice boulder. Definitely one of the most valuable purchases made for this climb.
10. CONVERTIBLE PANTS. I’m actually wearing mine as I type this, that’s how comfortable they are. Lightweight pants that can zip-off to become lightweight shorts. And the more pockets, the better. You can get a pair of these at just about any outdoor retailer but you have to hunt around to find good deals. I priced convertible pants from Columbia, REI, The North Face, and Mountain Hardware, but I eventually went with a cheaper pair from Dakota Grizzly. One feature Dad had on his convertible pants that I was envious of was a zipper at the ankles to easily slide the pant legs off without removing your boots. That would have been a nice feature, but at that point I had to keep costs down.
11. TREKKING POLES. Some people swear by them and some people hate them. One thing is for sure, they take some getting used to at first. You can usually find a good deal on Amazon and some of them have shock-absorbing springs inside that make the trek a little more comfortable. Nearly all will have a tiny compass built into the grip so if you get lost you at least have a fighting chance of knowing how to get out. However you feel about them, they are telescopic so they are easy to put away in a backpack when not in use. I found them to be only moderately useful going up the mountain, but extremely handy when coming down. They won’t support your entire weight, but they’ll help you stabilize on tricky boulder crossings.
12. CAMERA. I shouldn’t have to say it, but I’ll bet there are more than a few people who get to the summit only to realize they forgot to bring a camera. Make sure to bring the camera! And extra batteries. And the memory card. Don’t let a temporary case of absentmindedness prevent you from a lifetime of memories.
13. MORE SUNSCREEN. Seriously, bring a lot. After I got to the summit, I was so excited that I forgot to reapply before heading back down 45 minutes later. By the time I reached Dad waiting for me at Camp Ebel, my face and arms were pretty well cooked. Keep in mind that you’re sweating fairly regularly and whatever sunscreen you apply will likely be gone within an hour or two.
14. GAITERS. Another non-necessity, but impressively useful. My thoughtful wife again bought mine for my birthday, so I was going to use them whether I needed to or not. As it turned out, I didn’t need them until about lunchtime when we stopped to rest at Camp Ebel. The climb from that point on involved a lot of ash, dust and gravel, and the gaiters were the only things keeping it from getting inside my boots and socks. I’ve got a pair of Outdoor Research Rocky Mountain Low gaiters, and while I may not use them again until I climb another mountain (or take them hunting), for less than $30 they were well worth it, especially when glissading back down the summit slope.
15. BOOTS. You’ll notice I didn’t say shoes. I lost count of how many college kids I saw that day climbing the mountain in sneakers, and a few even wearing toe-shoes. While that kind of footwear may be fine for running or trail hiking, mountain climbing requires much more stability and strength than I think Skele-toes or FiveFingers can offer. My Hi-Tec Sierra Lite I WP hiking boots were absolutely ideal for this kind of activity and literally saved my butt on more than occasional loss of balance or misplaced trekking pole. The Vibram soles kept my feet in fine shape, and the tough toes gripped more than their fair share of rocky outcroppings. Though they came new in black and orange, by the time I got down the mountain they were grey with ash, along with my gaiters, calves and knees. I worried about cleaning them afterward, but since they’re waterproof I just turned a hose on them when I got home. They cleaned up beautifully.
I sincerely hope anyone reading this is inspired to climb a mountain of their own. I hope it’s one of the beloved mountains of Washington State, but any mountain that strikes a chord in your heart will suffice. It’s not just something other people talk about. You can do it too. Just make sure you have the right training, the right gear and the right attitude and you’d be surprised how high you can climb.
ANOTHER ROUND? Go back and read Part 1, Part 2 or Part 3!


Awesome! Best of luck. The weather should be gorgeous, so I hope you make it to the top!
Thanks for the super report!! I’m almostvyour dad’s age, doing the hike TOMORROW 8/27/17- with kids and granddaughter…hoping and praying I can keep up but knowing at least I’m prepared!